obsidian图床设置
文章简介
该方案通过github库做存储空间,[[obsidian第三方插件#image auto upload|image auto upload plugin]]插件提供粘贴图片的自动上传服务,Picgo配合该插件提供图片上传到github,cloudflare通过自定义域名绑定github库提供CDN加速服务,实现图片预览
一、 github设置
1. 本地[[../网络/hosts文件|hosts]]文件修改。
- github域名被墙,可通过修改本地[[../网络/hosts文件|hosts文件]],添加GitHub的域名和IP映射,实现GitHub的访问。
# GitHub Start |
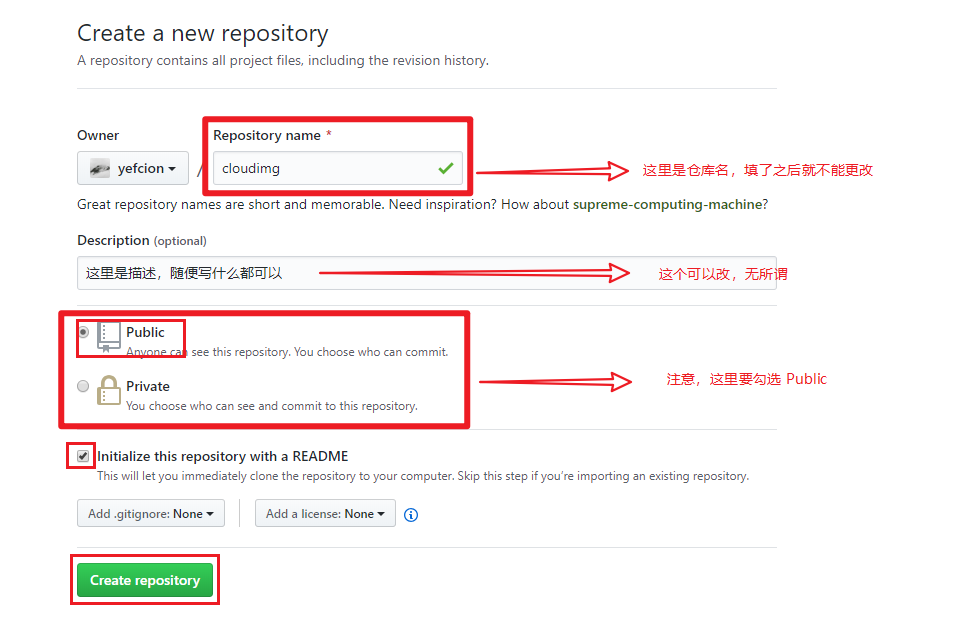
2. Public仓库建立
- 点击 git 主页左上角的
new创建New repository
仓库信息设置Public因为后面通过客户端访问算是外部访问,因此无法访问Private,这样的话图片传上来之后只能存储不能显示。所以要设置为Public
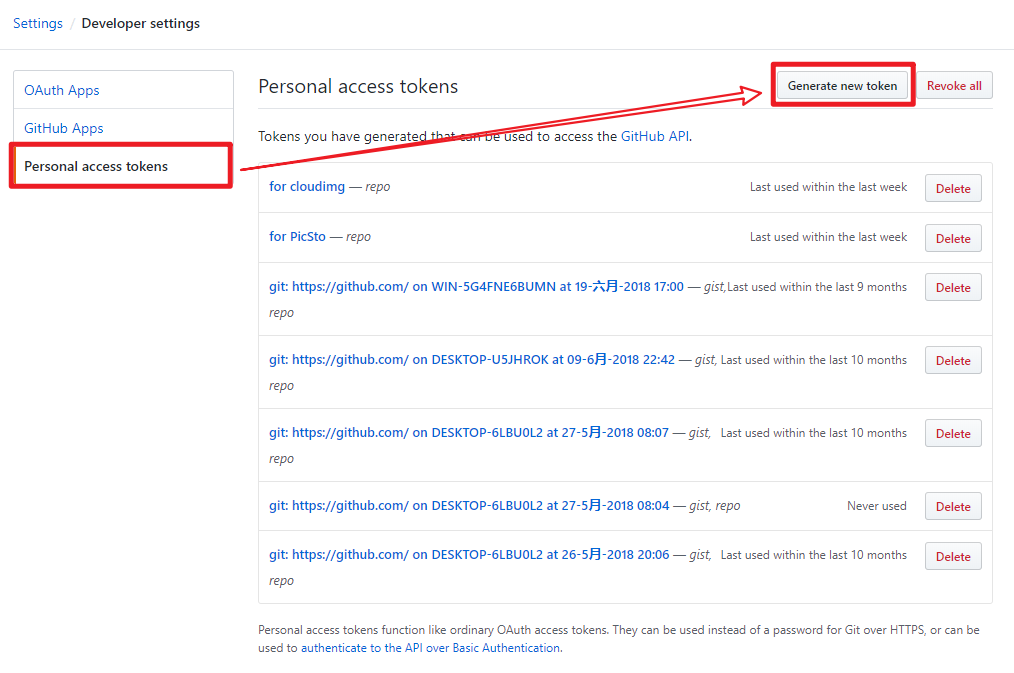
3. 创建token
- 点击右上角头像,然后进入设置
Developer settings,点击进入创建 token
#补充 token选择classic
勾选复选框 repo ,选择链接存在时间,Expiration(过期时间)为 No expiration(永久),接着到页面底部
Generate token就完成token的创建。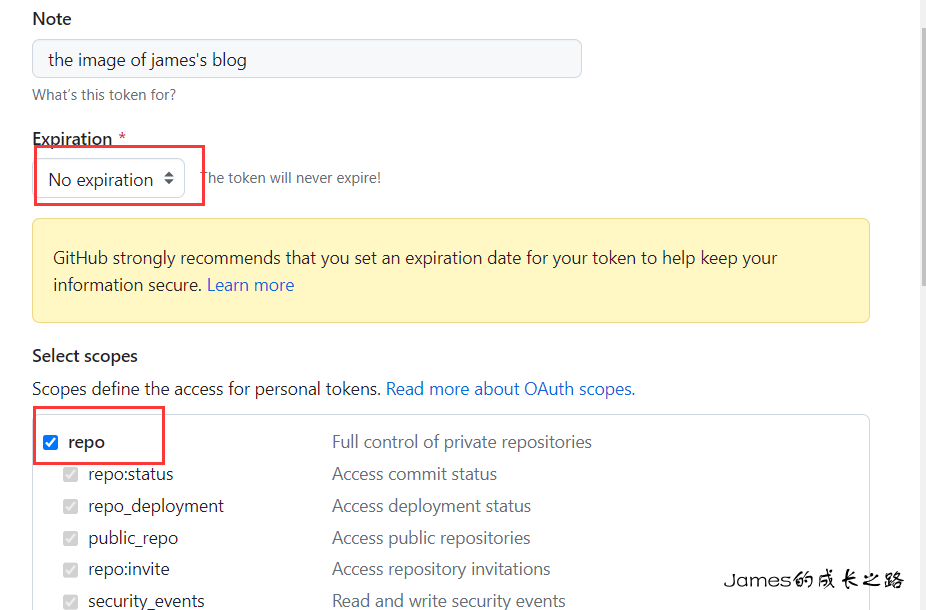
记录生成的字符 token,这个
token 只出现一次,所以要保存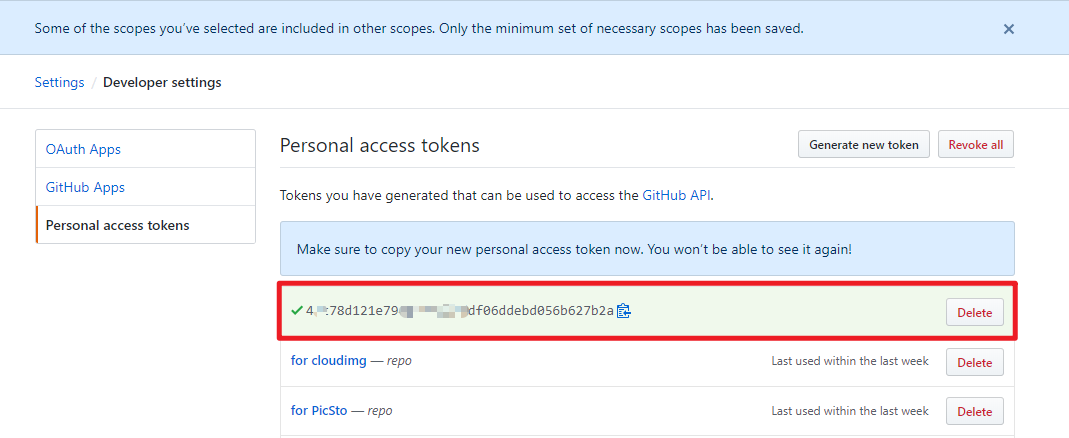
二、Cloudflare设置
1.无域名
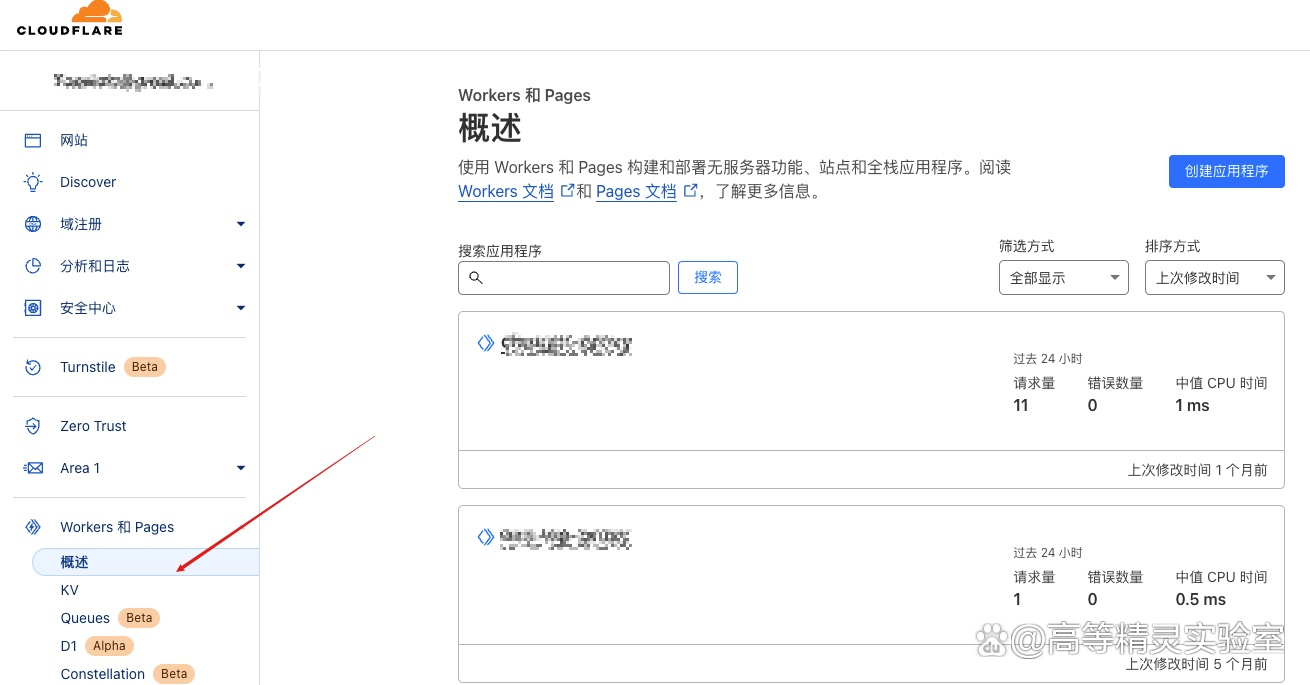
进入Workers和Pages概述界面
在Cloudflare主页,点击左侧Workers和Pages——>概述菜单
连接Github项目
首先,点击右上角创建应用程序,跳转到创建应用程序页面,并切换到Pages界面:
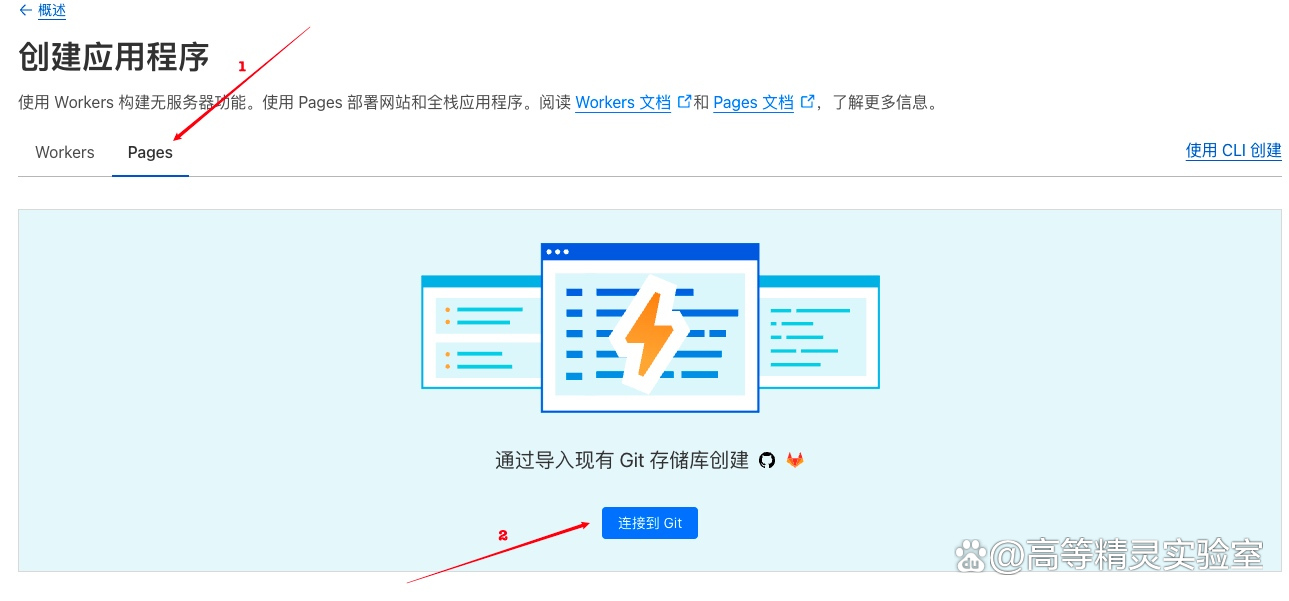
点击
连接到Git按钮
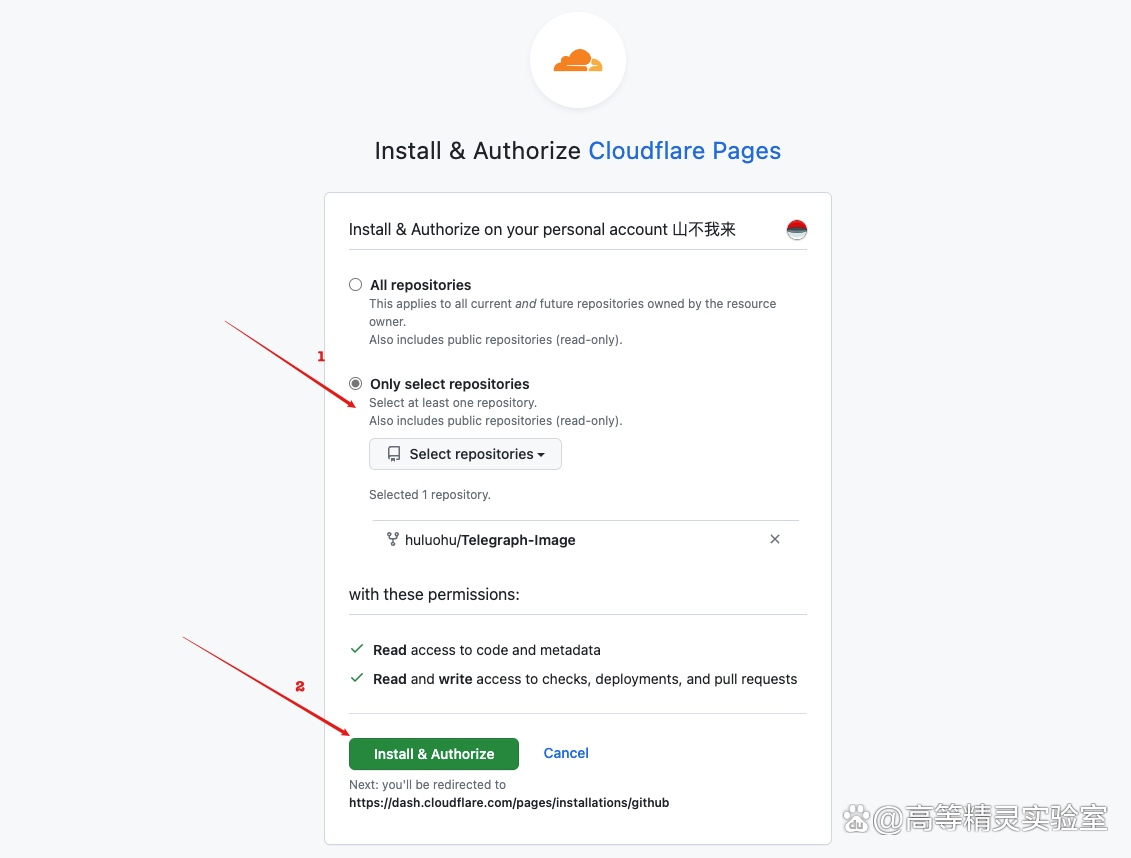
在弹出界面中选择Github,并点击连接Github按钮,Cloudflare会自动引导你到Github授权页面,如果没有登录Github,则会先到登录界面。选择项目部署方式
选择Only Select repositories,并选择上面fork好的项目,然后点击Install & Authorize按钮,确认完成授权和开始安装
Github可能会要求你输入账号密码,以确认上面的授权。输入你的Github密码并
Confirm即可项目部署
确认授权后,会从Github自动跳回到Cloudflare中,继续开始后续的部署设置。
选中上面授权好的Github项目,点击开始设置

项目名称:自定义域名名称(想一个自己喜欢的域名名称)
生产分支建议保持默认的main,其他的不要动,拉到最后,点击保存并部署,等待Pages自动部署项目。

部署成功
cloudflare自动分配了一个默认的域名(根据上一步输入的项目名称决定的)

#补充 记得保存自动分配的域名
2.1 自己域名
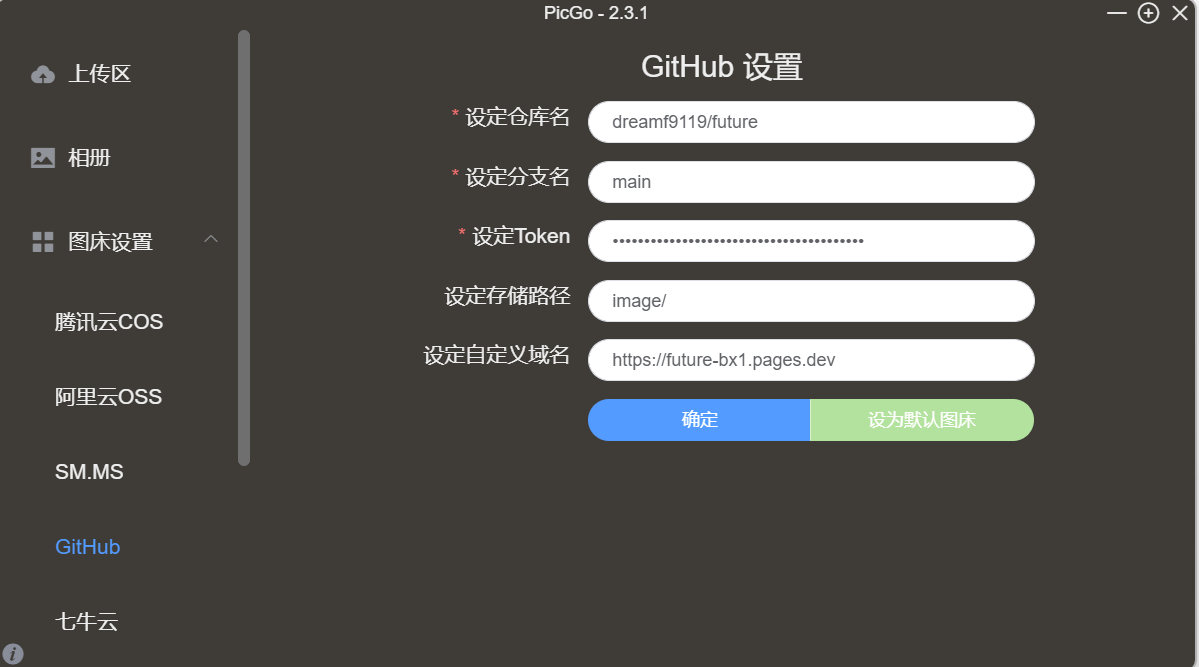
三、Picgo
- 仓库名:[github用户名]/[第一步新建的仓库名称]
- 分支:默认master,从2020.10.01开始,github的默认分支名变更为main
- 设定token:github创建的token
- 指定存储路径:可填可不填,如果填写了,图片就会存储在image文件夹下
- 设定自定义域名:cloudflare分配的域名。